Fine hands fists of fury our hands evolved for punching not just
Table of Contents
Table of Contents
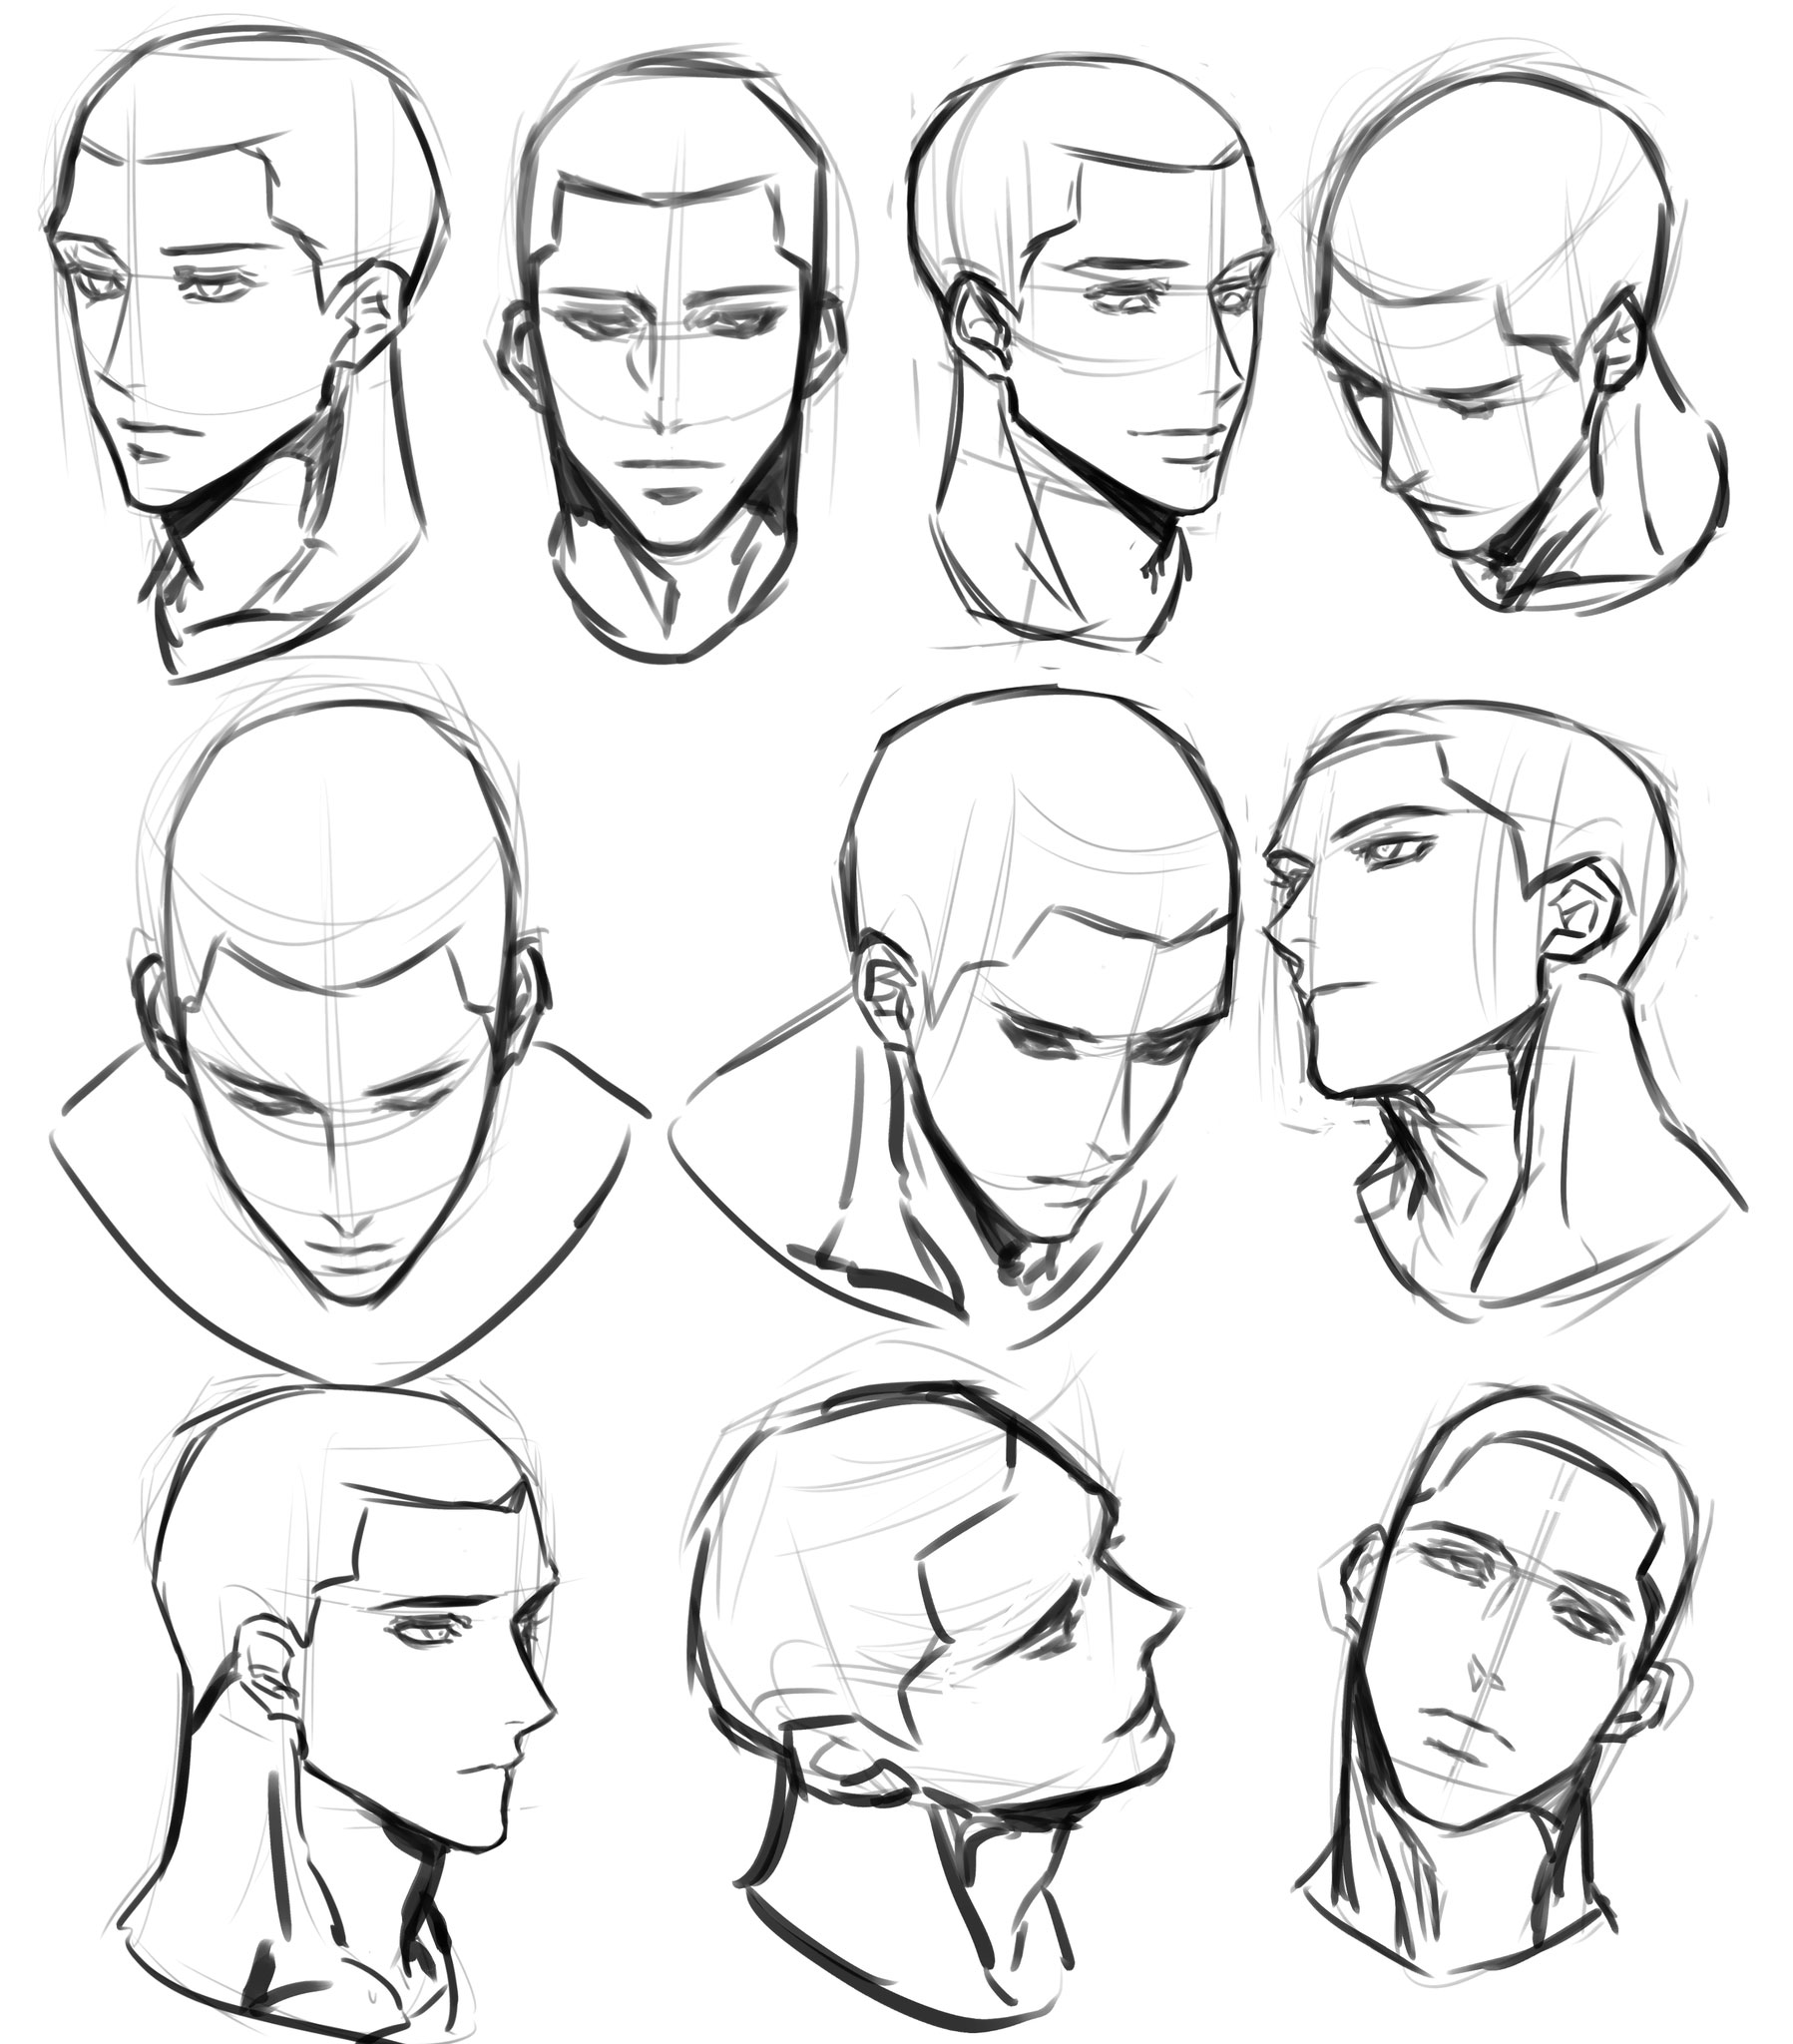
In today’s world, drawing is a valuable and essential skill to have. Whether you’re an artist or not, knowing how to draw can help you in your daily life in a variety of ways. One aspect of drawing that many people get stuck on is how to draw a fist side view. This skill can be especially important in fields like comics, animation, and graphic design. In this post, we will explore the process of drawing a fist side view from start to finish.
When it comes to drawing a fist side view, there are a few pain points that artists may encounter. Perhaps the most significant challenge is getting the proportions right, as fists come in all shapes and sizes. Additionally, capturing the sense of force and impact that a clenched fist can represent can be intimidating for some artists.
Fortunately, drawing a fist side view is a skill that can be learned with practice. The key to success is breaking down the process into manageable steps and taking the time to work on each step until you feel comfortable with it.
First, begin by sketching the basic shape of the fist, taking note of the position of the thumb and where the fingers meet the palm. Once you have roughed in this basic shape, you can begin to work on the details. Add lines to indicate the knuckles, and take care to make sure the fingers are in proportion to the rest of the fist. Finally, add shading to create the illusion of depth and force.
To summarize, drawing a fist side view is a process that requires a combination of observation, patience, and practice. By breaking the process down into manageable steps and focusing on each step until you feel comfortable, you can master this essential skill.
How to Draw a Fist Side View, Step by Step
When it comes to drawing a fist side view, it’s essential to start by getting the basic shape right. Begin by sketching an oval shape that will represent the palm of the hand. Then, add a smaller oval to represent the thumb, taking care to place it in the right position. Next, sketch in the position of the other four fingers, taking care to make sure they are in proportion to the rest of the fist. Once you’re happy with the angles and proportions, you can begin to add details, like the knuckles and nails. Finally, use shading to create the illusion of depth and force, emphasizing the creases in the skin and the knuckles to give the fist more definition.
With practice, you’ll find that drawing a fist side view becomes more comfortable, and you’ll be able to experiment with capturing different angles, sizes, and shapes.
Mastering Fist Side View Techniques
One of the most significant challenges in drawing a fist side view is getting the proportions right. To help with this, try to break the fist down into smaller shapes that are easier to capture. For example, try drawing the knuckles as small circles and building the rest of the hand around them. Additionally, paying close attention to the position of the thumb and how the fingers meet the palm can help you get the proportions right.
To add more depth to your drawings, experiment with shading techniques. Use thicker lines to emphasize the creases in the skin, and add shadows to make the fist look more three-dimensional. With practice, you’ll learn how to capture the sense of force and impact that a clenched fist can represent.
Getting Creative with Fist Side View Drawing
Once you’ve mastered the basics of drawing a fist side view, you can start experimenting with different shapes and sizes. Try drawing fists in different positions, from different angles, and using different styles. You can also experiment with adding different textures to your drawings, like making the fist look rough or calloused.
Fist Side View Drawing Tips and Tricks
To further improve your skills in drawing a fist side view, consider practicing with different materials. Experiment with different pencils, pens, and markers to see what works best for you. You can also try working on different types of paper, like sketch pads or newsprint.
Question and Answer
Q: Is it necessary to draw the fingers and knuckles in detail?
A: While it’s important to get the proportions right when drawing a fist side view, the details are what bring the drawing to life. Take the time to work on the details, like the knuckles and fingers, to create a more realistic and impactful drawing.
Q: How do I capture the sense of force and impact in my drawing?
A: Use shading to create the illusion of depth and force, emphasizing the creases in the skin and the knuckles to give the fist more definition. Additionally, paying close attention to the position of the fingers and thumb can help you create a more dynamic drawing.
Q: Can I draw a fist side view without any reference material?
A: While it’s possible to draw a fist side view without reference material, it’s always helpful to have a visual guide to work from. Look at photos of fists from different angles and positions, and try to recreate them in your own style. As you practice, you’ll start to develop a better understanding of how to create dynamic and impactful drawings.
Q: What are some common mistakes to avoid when drawing a fist side view?
A: One common mistake is getting the proportions wrong, particularly between the fingers and the rest of the hand. Additionally, neglecting to add details like the knuckles and nails can make the drawing look flat and uninteresting. Finally, be careful not to overdo it with shading or details, as this can detract from the overall impact of the drawing.
Conclusion of How to Draw a Fist Side View
Drawing a fist side view can be a challenging skill to master, but with practice and patience, it’s possible to create dynamic and impactful drawings that capture the sense of force and impact that a clenched fist represents. By breaking the process down into manageable steps and focusing on each aspect of the drawing, you can create fist side views that are both realistic and visually appealing. With time and practice, you’ll find that drawing a fist side view becomes more comfortable, allowing you to experiment with different shapes, sizes, and styles.
Gallery
How To Draw A Fist - Step By Step Easy Drawing Guides - Drawing Howtos

Photo Credit by: bing.com /
How To Draw Fists Side View Clenched : Drawing Cartoon Pounding Fists

Photo Credit by: bing.com / draw fists easy cartoon drawing clenched step side pounding tutorial drawinghowtodraw fist drawings instructions written
Back Of Fist Drawing - Google Search

Photo Credit by: bing.com / fists
How To Draw Fists Side View Clenched : Drawing Cartoon Pounding Fists

Photo Credit by: bing.com / draw drawing fists easy cartoon tutorial step side clenched fist pounding hands steps reference drawinghowtodraw down learn drawings getdrawings
Fine Hands, Fists Of Fury: Our Hands Evolved For Punching, Not Just

Photo Credit by: bing.com / fist hand hands human clenched fists evolved drawing punching dexterity fury fine study side punch reduce buttress chance views three